There are several ways we can record audio in ShareX. In this article we will cover all of them. Both recording video together with audio as well as recording audio by itself.
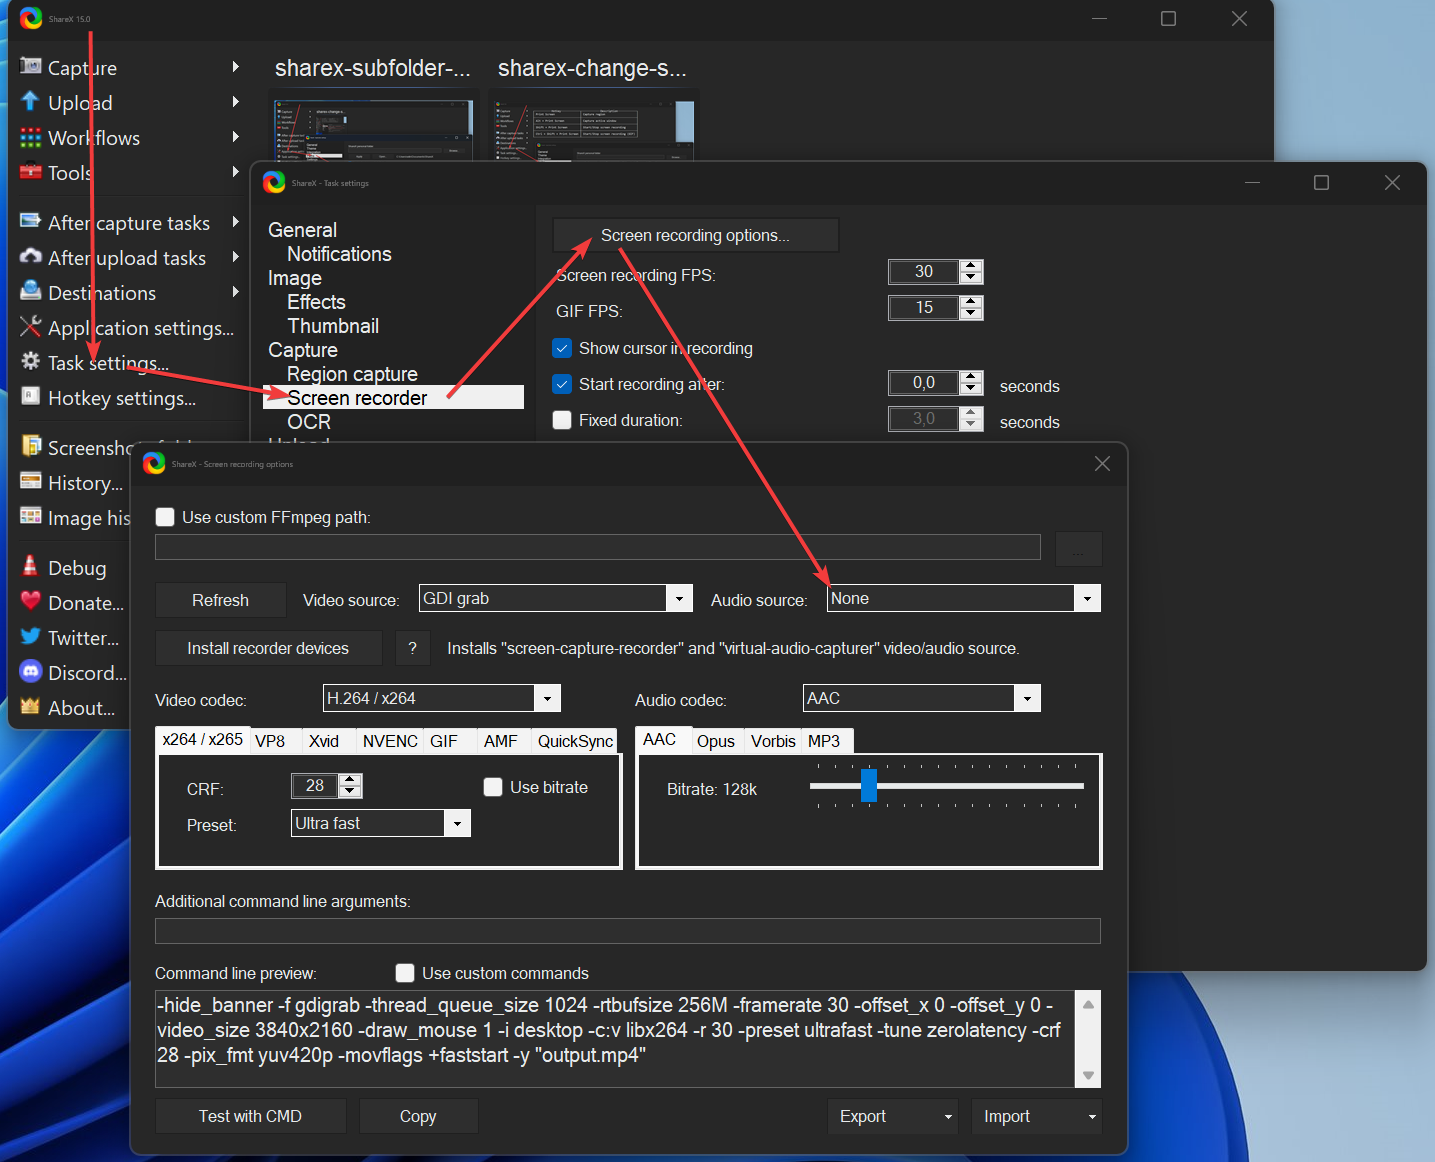
To record audio in ShareX, go to Task settings>Screen Recorder>Screen recording options and choose your audio source, such as a microphone. Next, start a recording with the shortcut Shift+Print Screen.
Let's go through each of the scenarios we might need to know when recording audio in ShareX.
To add audio recording to our video we can follow the quick step in the introduction above. I just want to start by expanding this explanation.
By default, ShareX is setup to record video without any audio. What we do is that we simply select a device for ShareX to capture audio together with the video capture that is already setup when we installed the application.
When we start the recording, you might get a warning that tells you that FFmpeg isn't installed and prompts you to install it before the first recording. Simply follow the instructions on the screen to install FFmpeg for ShareX.
Once this is done, we can again press Shift+Print Screen. The next step is to choose the area to record for the video. If you want detailed instructions on how this works you can read the guide here:
Related content: How to record your screen using ShareX for free
After you have done a recording, it will be stored in your screenshots folder. By default this is located in your user profiles documents folder in a subfolder named ShareX.
Related content: How to change the screenshot folder in ShareX
You can also change this folder in application settings>Paths by checking "Use custom screenshot folder" and setting your destination in the filed below.
When recording audio with ShareX we can choose from multiple audio codecs. By default, it is setup to use AAC with a bit rate of 128k. If you are not familiar with encoders or how they work, this is good from most use cases.
If you are a more advanced user, you have the option to change the bitrate or use any other for the four available codes for your specific scenario.
You can change the codec used in task settings>Screen recorder>Screen recording options and the available options are:
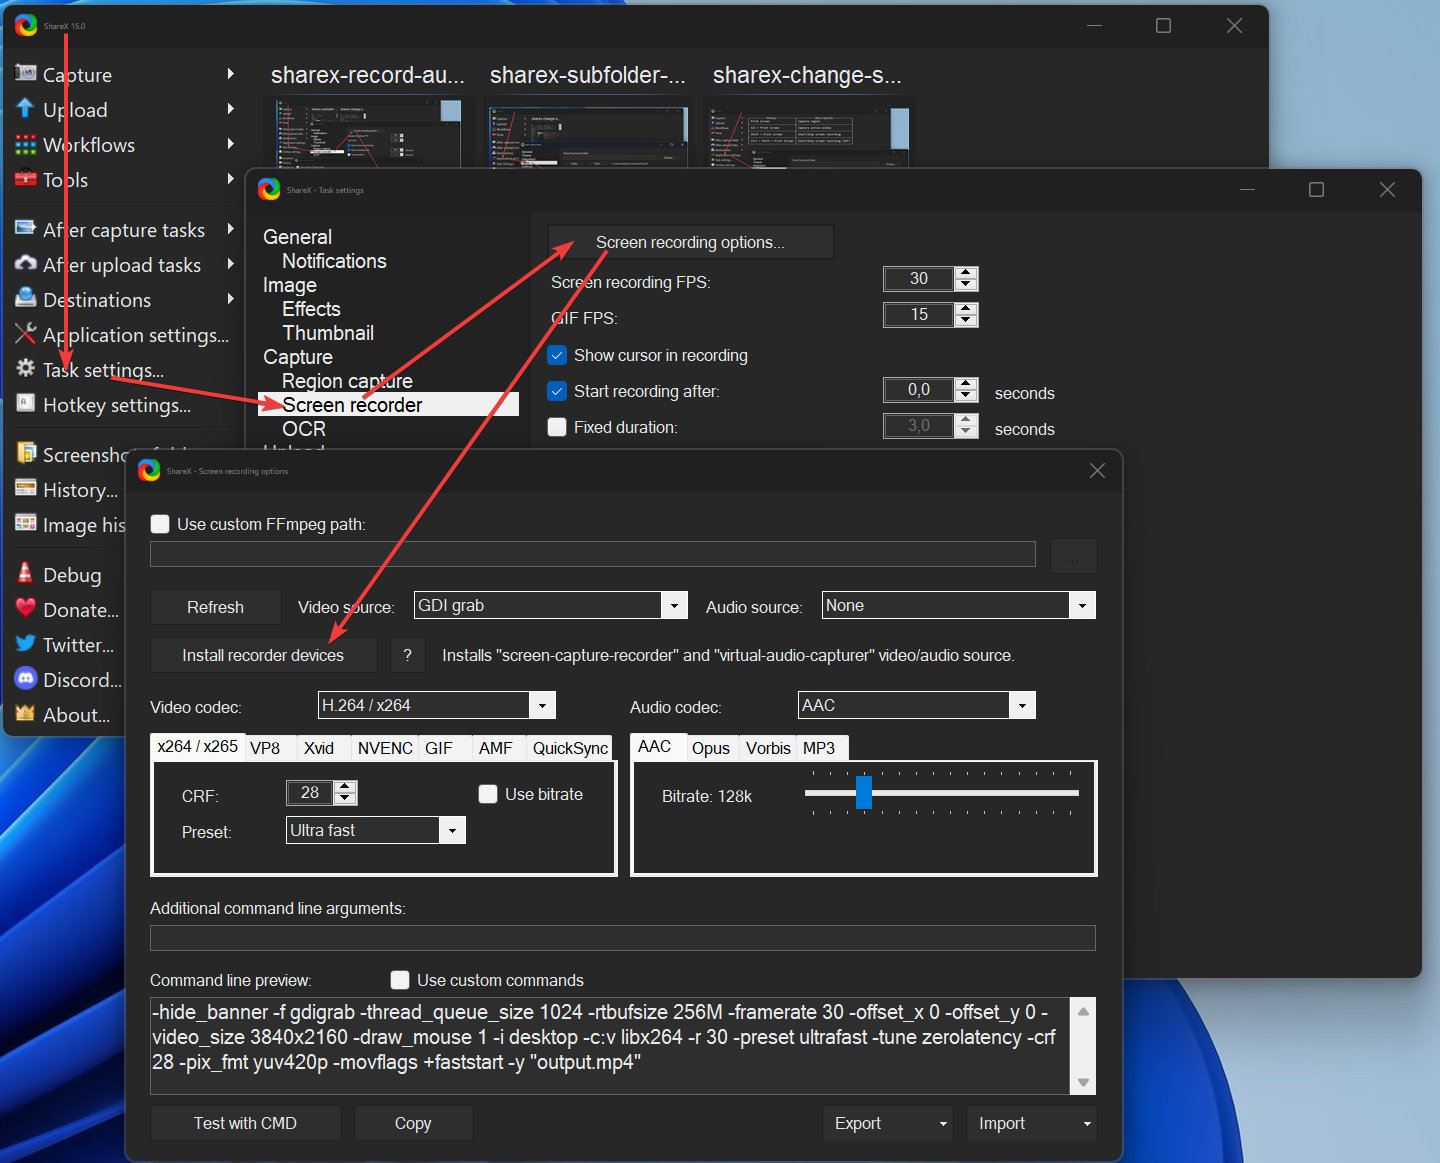
If instead of recording a microphone you want to record system audio such as audio coming from a video that you play back or a song playing on your system.
You can do this if you install the virtual audio capturer for ShareX. Here are the steps:
The next time you record with ShareX the sound from your speakers will be recorded as the sound for your video.
Unfortunately, there is no easy way to record both a microphone and system audio at the same time. For this we need another application to mix together the sound and output the mix to another audio source that we can then use directly in ShareX as the audio source.
An application that allows us to do this is Voice Meeter that you can get here:
External content: VB-Audio VoiceMeeter
There are several versions, for most cases though, if you need a software audio mixer like this, I suggest that you start with the banana edition as it has a bit more features while still not overwhelming.
We might also run into the scenario where we simply don't want to record any video, instead we just want to record audio. ShareX allows us to do this as well.
To setup ShareX to record audio only, follow these steps:
The result will be an m4a file stored in your screenshots folder. This is an audio file that does not contain any video even if we had to choose an area to record for the video. The video portion simply doesn't get recorded or saved.
There is a problem with this method though, what if we sometimes want to record audio only and sometimes both video and audio. Then we would need to change the video source every time we want to change from recording both video and audio to only audio or only video for that matter.
Let's see how we can set up a separate workflow for recording audio only. We can then use the same method for setting up workflows for various scenarios.
To set up a new workflow for capturing and recording audio start by setting up a new hotkey for the action. Go to hotkey settings and press Add.
A new row will appear in the list of hotkeys. Where it says None on the left side, press it and go to Screen Record>Start/Stop screen recording.
Next, where it says None on the right side, press it and choose a Shortcut you want to use to start this workflow.
Now, press the little cog icon in the middle. This will open the task settings, but it is a bit different. The task settings that we change here are for this task only. By default, all tasks use the default settings that we set by going to Task Settings in the application menu. But here we can override those settings.
Start by going to Capture and check "Override capture settings". This makes it so that we can override all settings in the capture section, including region capture, screen recorder and OCR.
Next, just like before, go to Screen recording options in the screen recorder settings and set video source to none.
Set your audio source to your microphone or the virtual-audio-capturer if you want to capture system audio.
Next exit out of all settings windows and use the shortcut you set for the workflow we created.
Press the same shortcut to stop recording or go and press the red circle tray icon next to the clock on your task bar.
In this article we looked at how we can record audio in ShareX. Both with and without video as well as using a microphone or recording the system audio.
We also learned how we can setup multiple workflows for these different scenarios so that we don't have to go and cahnge our video and audio settings every time we want to record a different combination of audio and video.
I hope it was helpful and thanks for your time.