Obsidian comes with core plugins pre-installed that we can toggle on or off from the settings. Go to settings > Core plugins and click the button to turn on or off any built-in plugin.
After launching Obsidian, go to Settings > Community plugins and press "Turn on community plugins". Next click browse. From here you can search for or browse all community plugin found in the community plugin browser.
If a plug-in is not in the community plugin browser, we can manually install it from an external source. Download and extract the plugin folder into this sub-folder inside your vault.
Vaultpath\.obsidian\pluginsWhere Vaultpath is the path where your vault is located. The .obsidian folder can be changed in Settings>About.
Core plugins are always installed. But we can toggle them on or off. You might already use multiple core plugins without realizing since a lot are enabled by default.
We can enable and disable plug-ins by going to Settings. This is the cogwheel in the lower left corner of the interface.

Next, go to core plugins and you will see a list of all core plug-ins with a toggle on their right side and a brief description below the name of each plugin to help you identify what they do.

Obsidian divide all settings into three categories. One of them is the core plugins. If a plugin has settings, you can find them here.
For plugin specific hotkeys, go to the hotkey page in the settings menu and search for the plugin name.

All commands are available for the plugin and will start with the plugin name followed by a colon and then the command.

To change a hotkey for a core plugin command, search for the plugin name, find the command you want and click the plus sign to the far right and press the hotkey you want to assign.
Obsidian offers a quite barebones default configuration, with only a few shortcuts assigned from the start.
Plugins that are not core plugins are community plugins. We find most in the community browser. Once again, go to settings and find community plugins in the menu options. Here you first need to turn on community plugins and acknowledge that third party plugins are a potential security risk.


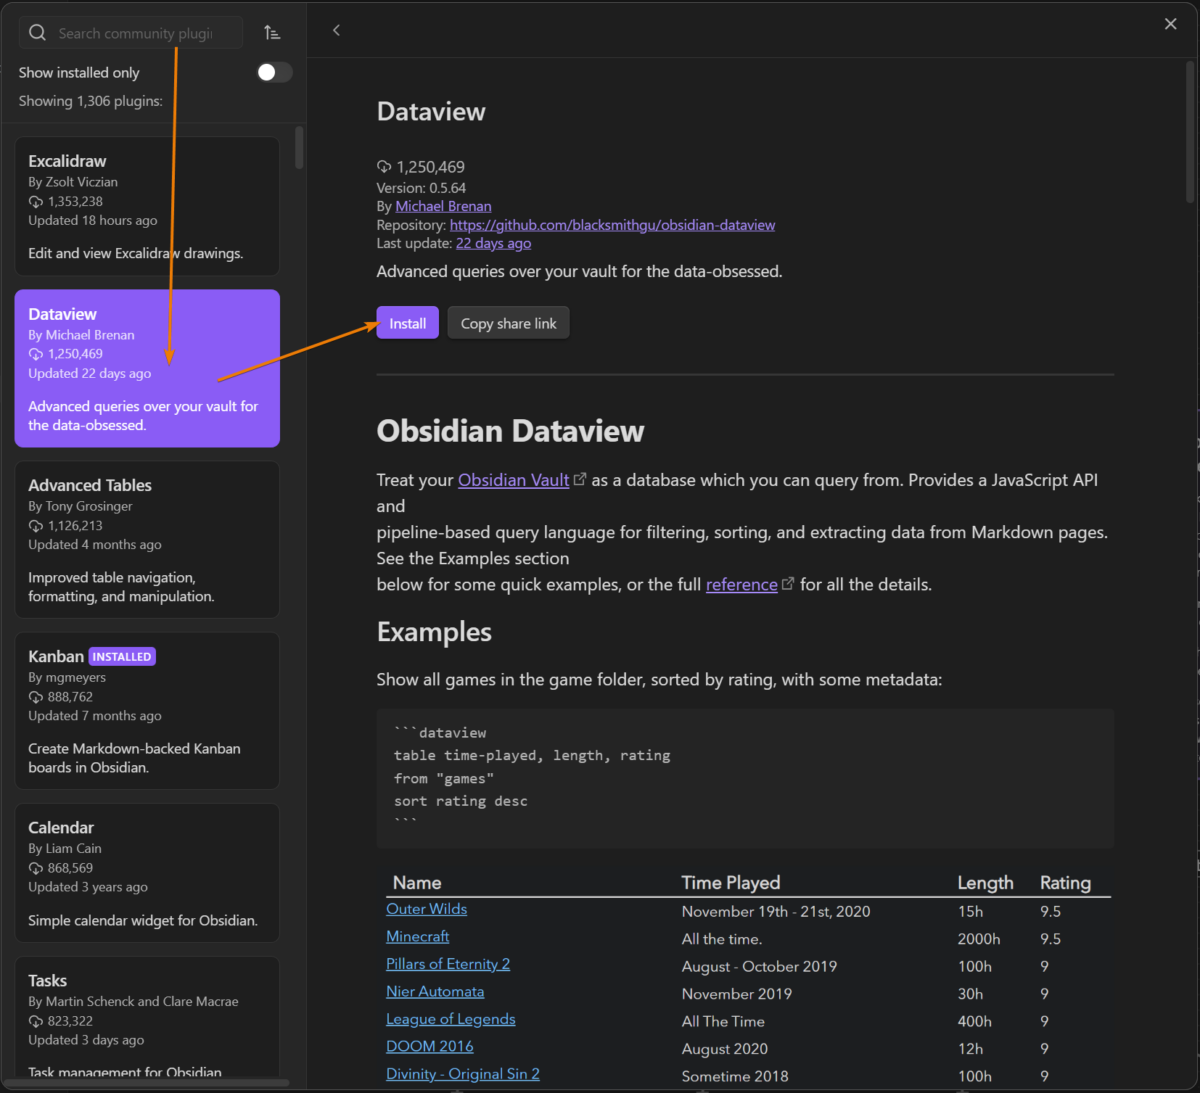
At the top, you can filter the list by searching for any keyword. You can also press the icon just to the right of the search box where you can sort the plugins differently.
For example alphabetically, by recent update or by release date.
You can also toggle the "show installed only to show only installed plugins.
This can be handy those times you want to uninstall, or reinstall a plugin.
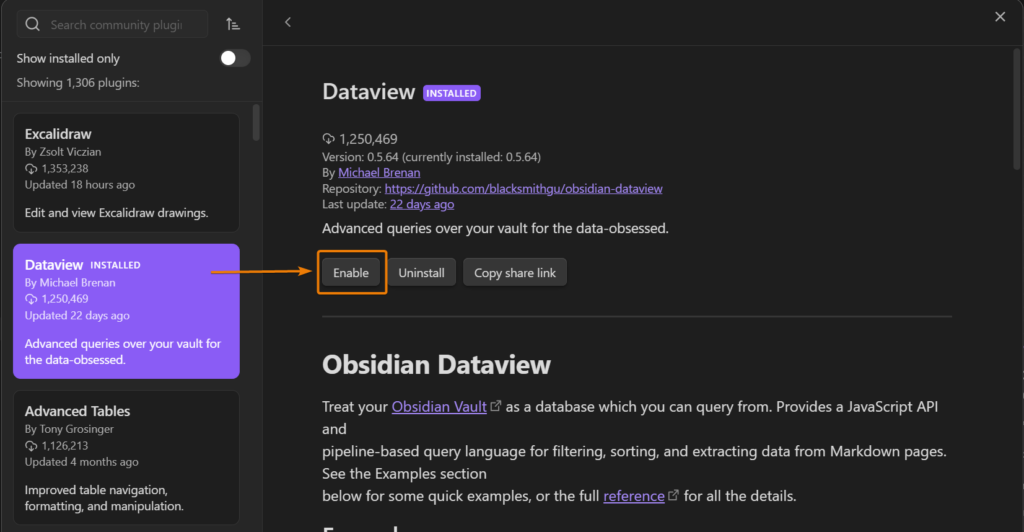
You can click on any plugin to get more information about it, from meta information such as version, creator, and when it was alst updated to a description about the plugin, how to use it and install it.
If the plugin is not a core plug-in and ins't available through the community browser, you can manually install an Obsidian plugin. For example if the plugin you are looking for is only hosted on github or an external website.
Depending on what plugin you want to install it may work slightly different. In general though, we download a .zip file that we extract using an archive program. These days, tools to extract .zip files are available in most major operating systems.
We extract the plugin to this path:
Vaultpath\.obsidian\pluginsInside this folder, we should extract the plugin so that it is contained within it's own sub-folder. For example:
Vaultpath\.obsidian\plugins\calenar-pluginFor a calendar plugin, with all files then extracted directly into this folder.
We can also change the folder inside the vault where plugins are stored.
Go to settings > About, and find the override config folder at the bottom.
This is currently set to .obsidian. You can change this to another name and the plugins will live in a sub-folder called plugins below that config folder.
In this article we learned how to enable and install plugins in Obsidian. However, once a plugin is installed, it depends on the plugin how it is used and where it's settings and hotkeys are located.
To continue, go to the documentation for the plugin and read more about it there. For core plugins, go to the Obsidian documentation. For community plugins, go to the community page and for third party manually installed plugins, you will need to seek out the documentation on the repsective plugins website or repository.
Thanks for your time.