Enable the canvas plugin by going to Settings>Core plugins>Enable canvas. (should be on by default)
Create a canvas by pressing the "create new canvas" icon in the left side menu.
Click and drag one of the card options from the bottom on to the canvas to create a card or right click anywhere on the canvas.
A card can be an empty card that can contain anything a note can contain. Or it can be a note or most kinds of media such as images, movie files and pdf.
Convert a card to a note by right-clicking and choosing "convert to file".
Connect one card to another with an arrow by hovering an edge of a card and click-drag a line from the dot to connect it to another card or on empty space to create a new card.
Convert the arrow to a double arrow or line by clicking the arrows line and clicking the arrow icon to select another type.
Canvas is a feature in Obsidian that lets you create mind maps, flowcharts and similar types of graphics where you want to link information together in some way. Or simply have information displayed on a canvas for you to explore.
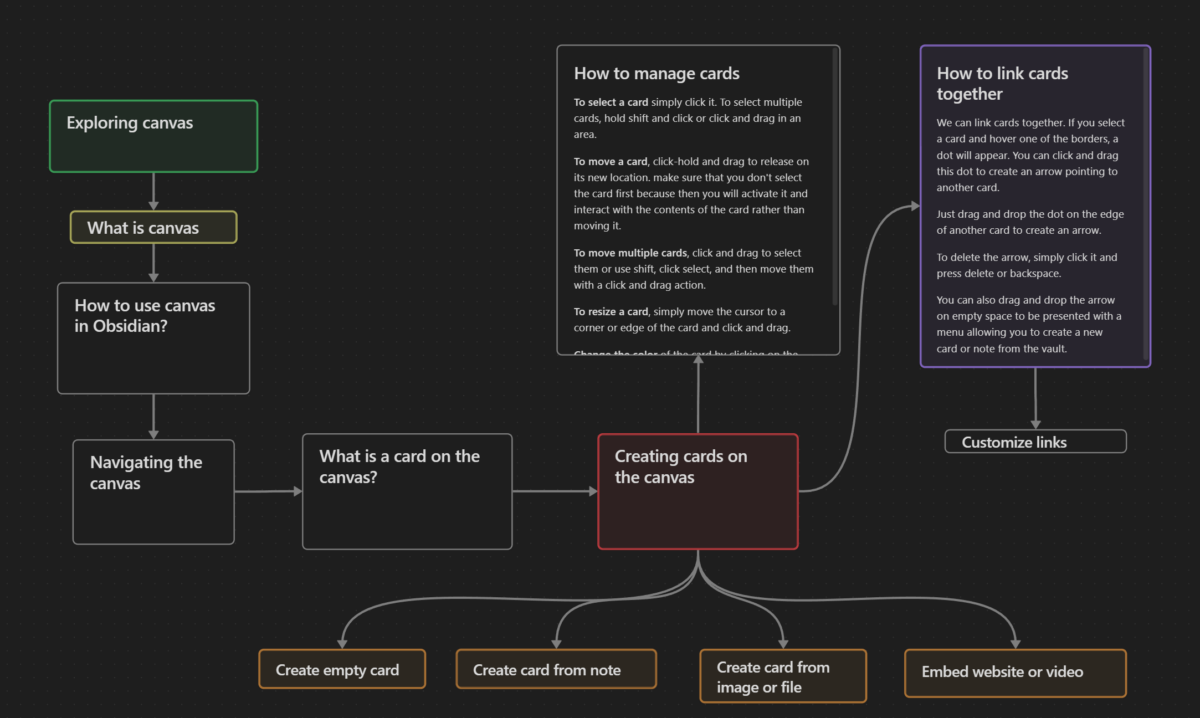
We can create multiple kinds of nodes and link them together as we like. Some examples of information we can bring onto a canvas are our notes, images, pdf files or websites. We can also create cards in our canvas that act as a box of information similar to a node. A card can also be turned into a note if we want.
We can also drag arrows between different media, or nodes on the canvas to create a visual flow.
It is a really powerful feature, so let's explore it in more detail.
To use a canvas in Obsidian, we need the core plugin called canvas enabled. Go to "settings>Core plugins" and make sure that Canvas is turned on. This should be enabled by default, but just in case.
Next we need to create a canvas. We can do this in several ways. The most straight forward way is to click the "create new canvas" button in the left side menu.

We can also press Ctrl+P to bring up the command palette and type "canvas" to filter out the canvas related commands and choose "canvas: create new canvas".
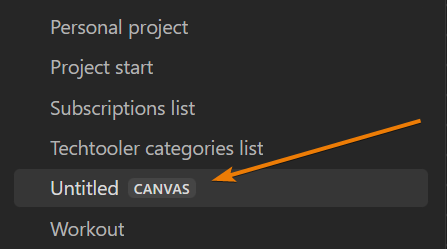
We can distinguish our canvas from regular notes by looking in the notes browser list. You see that the canvas note has a "canvas" label on it.
The canvas is a 2D space where we can scroll, zoom and pan around.
We can scroll the canvas workspace by scrolling the mouse wheel. Hold Shift, while scrolling for a horizontal scroll.
Pan the view by holding space and the left mouse button while moving the mouse. You can also hold only the right-click mouse button or click and hold the scroll wheel alone to pan.
To zoom, hold Ctrl or Space and scroll the mouse wheel.
Let's clear up some terminology. A card in Obsidian terminology can be either any kind of media you have on your canvas and sometiems a specific kind of media simply called a card.
A card as in any kind of media could also be called a node. You can recognize it as anything that can be selected and moved independently on the canvas. It can hold a note, an image, an embedded website or video to name a few.
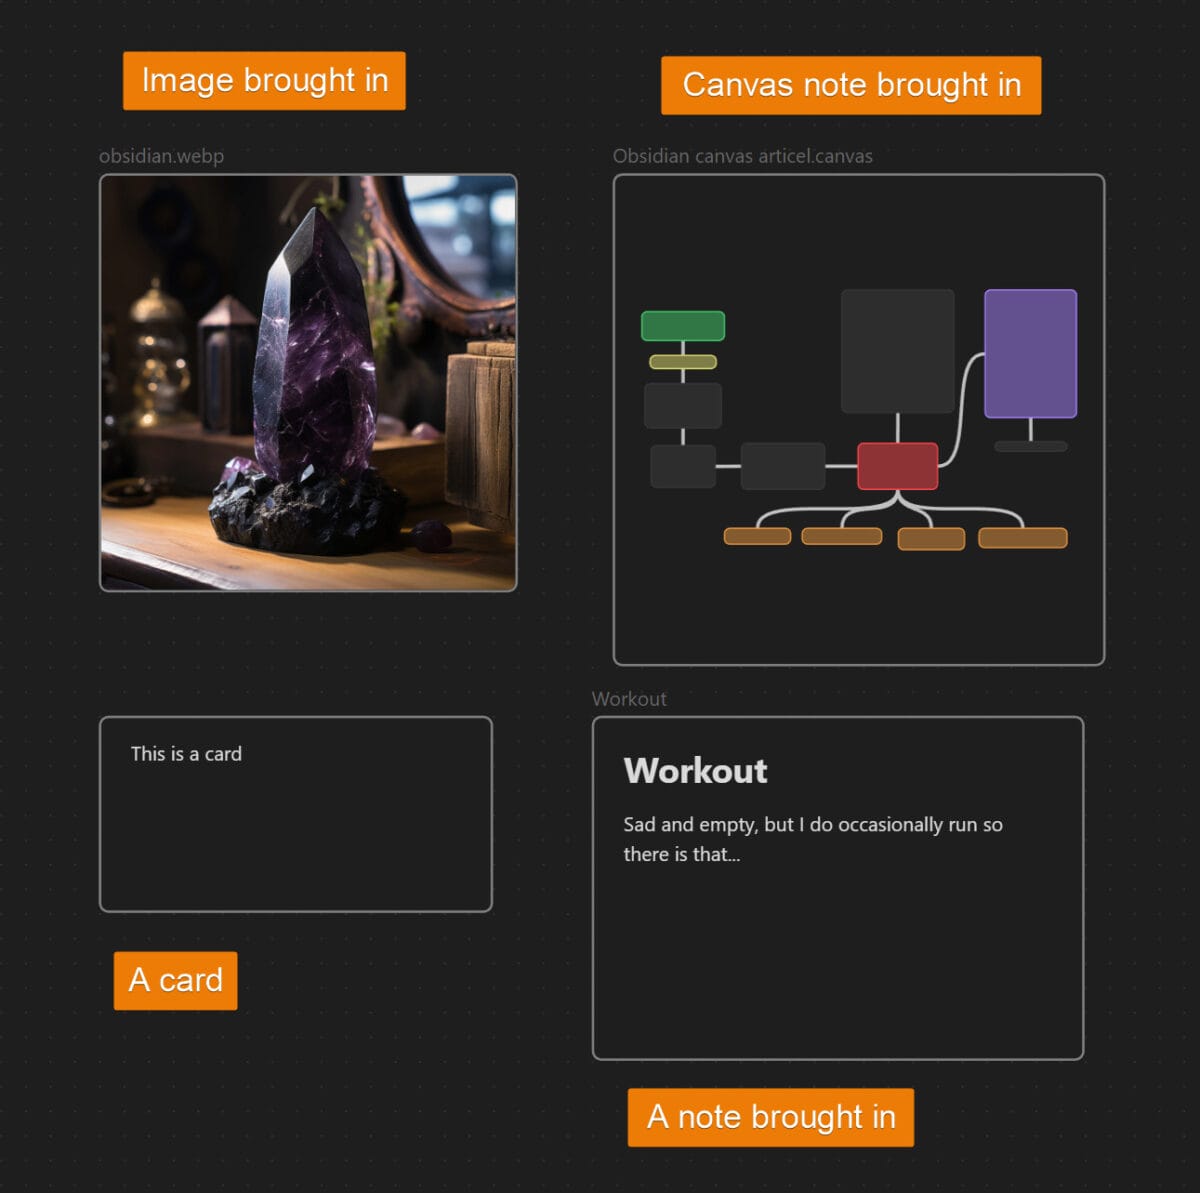
A card as in a specific type of node, is basically a note that only lives in your canvas. We can convert a card to a note and a card can also contain anything that a note can contain, but it is not available to link to from another note unless we convert it.
We will cover all features of cards as we move along in this article, but simply be aware that a card can be any card or a specific type that can work as a note, but independent from the rest of your vault.
To create nodes, or cards as they are called in Obsidian, we have multiple options.
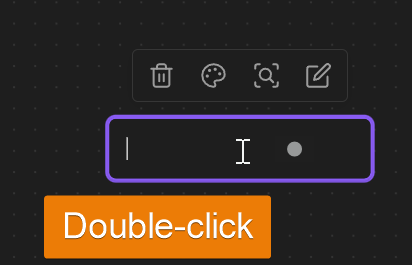
To create an empty card, double-click anywhere on the canvas and start typing. A card supports any kind of markdown, just like a regular note.
At the bottom of the canvas you also have three buttons, from here you can click and drag the leftmost icon to any place on the canvas to create a card there.
We can also right-click the canvas and choose add card.
To create a card from a note is like how we create an empty card. Right-click on the canvas and choose "add note from vault". A search box will appear where you can search for the note you want to add and hit enter.
You can also drag and drop the middle icon from the bar at the bottom of the canvas.
If we have a media file, such as an image in our vault that we want to add to our canvas, we can right-click the canvas and choose "add media from vault".
Next, serach for the file in the vault and hit enter to add it to the canvas.
You can also drag-and-drop any media file from your file browser or other software that supports drag-and-drop directly on to your canvas to import it.
Any media file we drag-and-drop is also added to the vault as a file.
This works with images, pdf and video files.
For unsupported file formats such as .docx a link is added instead so that if you click it, Word will open with the selected file.
We can also take a link to a website, copy and paste it into the canvas to create a card showing the website. Similarly we can copy and paste a link from YouTube to embed a video into the canvas.
To select a card simply click it. To select multiple cards, hold shift and click or click and drag in an area.
To move a card, click-hold and drag to release on its new location. make sure that you don't select the card first because then you will activate it and interact with the contents of the card rather than moving it.
To move multiple cards, click and drag to select them or use shift, click select, and then move them with a click and drag action.
To resize a card, simply move the cursor to a corner or edge of the card and click and drag.
Change the color of the card by clicking on the card and click on the color pallette icon to chagne the color.
We can link cards together. If you select a card and hover one of the borders, a dot will appear. You can click and drag this dot to create an arrow pointing to another card.
Just drag and drop the dot on the edge of another card to create an arrow.
To delete the arrow, simply click it and press delete or backspace.
You can also drag and drop the arrow on empty space to be presented with a menu allowing you to create a new card or note from the vault.
Links have slightly more customization options than the cards. Click the link on your canvas and you will get some options. We can change the color by pressing the color pallet icon.
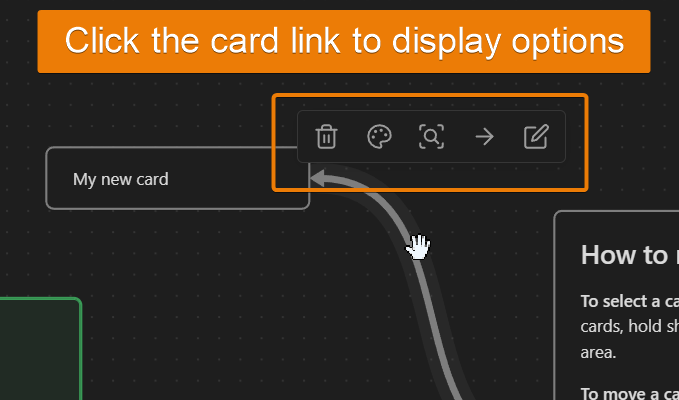
Add a name to the link by pressing the pen.
Change the type of link from an arrow to a straight line or double arrow by clicking the arrow icon. Notice that the icon will change depending on the current link type.
To reverse the arrow, you need to recreate the link by deleting it and drag-and-drop from the other direction.
A group allows you to visually group cards together. It also allows you to move the group as a whole and align cards inside the group.
To create a group, select multiple cards by left-click and drag on the canvas. You will get a row of settings just above the selected cards. To create a group from the selection, press the create group icon.
Once the group is created you will see a semitransparent background with a border around the group.
You can name the group by double clicking the title area in the upper left corner.
Obsidian consider any node that is now fully within the group area a member of the group. So if you have a card that you move into the group area that wasn't a member of the group when you created it is now a member.
Likewise, if you move a card outside the group area it is no longer a member of the group.
To move a group, first select the group by clicking the title or the border. Then hover the mouse inside the group so that the cursor becomes a hand then click and drag to move the group with all nodes inside it.
We can cahnage the color of the group area by selecting the group and pressing the color pallette icon.
To realign nodes in a group, select the group and press the align icon and choose the alignment type.
Keep in mind that some alignments may cause some cards to end up outside the group.
To delete a group, select it and press the trashbin. This will not delete the nodes inside the group. You can also press Delete or backspace to delete the group.
The canvas area has several shortcuts, including the ones for navigation mentioned above. In the top right corner of the canvas area you can find a question mark icon. Click it to display a list of shortcuts avaiable in the canvas area. You can also refer to the table below.
| Operation | Shortcut |
|---|---|
| Pan | Space + Drag, Scroll |
| Pan horizontally | Shift + Scroll |
| Zoom | Ctrl + Scroll, Space + Scroll |
| Zoom to fit | Shift + 1 |
| Zoom to selection | Shift + 2 |
| Select all | Ctrl + A |
| Add to / remove from selection | Shift + Click, Shift + Drag to select |
| Create a card with specific size | Ctrl + Drag to select |
| Clone card | Ctrl + Drag |
| Constraint card movement axis | Shift + Drag |
| Disable snapping while dragging | Alt |
| Remove card | Backspace, Delete |
| Undo | Ctrl + Z |
| Redo | Ctrl + Y, Ctrl + Shift + Z |
The feature to embed a canvas into another canvas or into a note has not been fully implemented yet. So far, if you try to embed a canvas, it is going to become a link to the canvas and you will see outlines of the notes inside the canvas, but not the full contents.
You can create a link to a canvas by drag and dropping the canvas from your vault into a note or another canvas.
We can also create a link the regular way by adding double square barckets. Also add the exclamation mark to convert it to a visual link rather than a text link.
![[MyCanvas.canvas|MyCanvas]]The first part being the link to the file and the second part being the name of the link.
Obsidian prides itself on being future proof by saving the data with open standards and open formats. For this, markdown and textfiles are used.
For canvas however, no such format was avaialble so the Obsidian team created their own file format. This format is the .canvas file format. It is a JSON based file format that has been open sourced so that your canvases should be future proof.
As of yet though there aren't many other applications that can read the format, but in the future, such an application could certainly be built.
More info is available here:
External source: Ycombinator Hacker news
Obsidian with the canvas core plugin is available on mobile. However it can be quite a bit harder to use on a touch screen.
To download Obsidian for your phone, go to the respective app or play store and serach for Obsidian.
When the app is downloaded and you start it for the first time it will ask for permission to access your storage. Create a vault or sync with one of your existing vaults.
Once inside your vault, click on the hamburger menu and choose to create new canvas.
The interface is similar to desktop, but is adapted to work with a touchscreen.
There is no bult in way of exporting a canvas as pdf. However a user named rrherr on the Obsidian forum created a script to export a canvas as html that can then be printed as a pdf when you open it in your browser.
Just note that copy and pasting code from the internet could pose a security risk, be cautious.
You should now be able to comfortably use canvas within Obsidian. A powerful tool that allows you to organize thought, visualize flows and systems.
You could use it to build the workflows for your business, the flowcharts for how your software should be designed or just outline an article. Be creative
Thanks for your time.
