To highlight text in Obsidian add double equal signs on either side of the text like this.
==this text is highlighted in obsidian==
If you are highlighting to the end of the line, you can omit the trailing double equal signs. This way of highlighting is standard following the syntax on markdownguide.org as you can see here:
External content: Markdnowguide.org highlight syntax
If we want to use multiple colors for highlighting we can do so by using the <mark> tag and CSS. In this case the syntax becomes much more complex. It looks like this.
<mark style="background: Brown;color:#FFFFFF;">Some text that is highlighted</mark>This would result in a text that looks like this:
Some text that is highlightedThis is a cumbersome way to work, but to make it easier, there is a plugin that make highlighting very efficient.
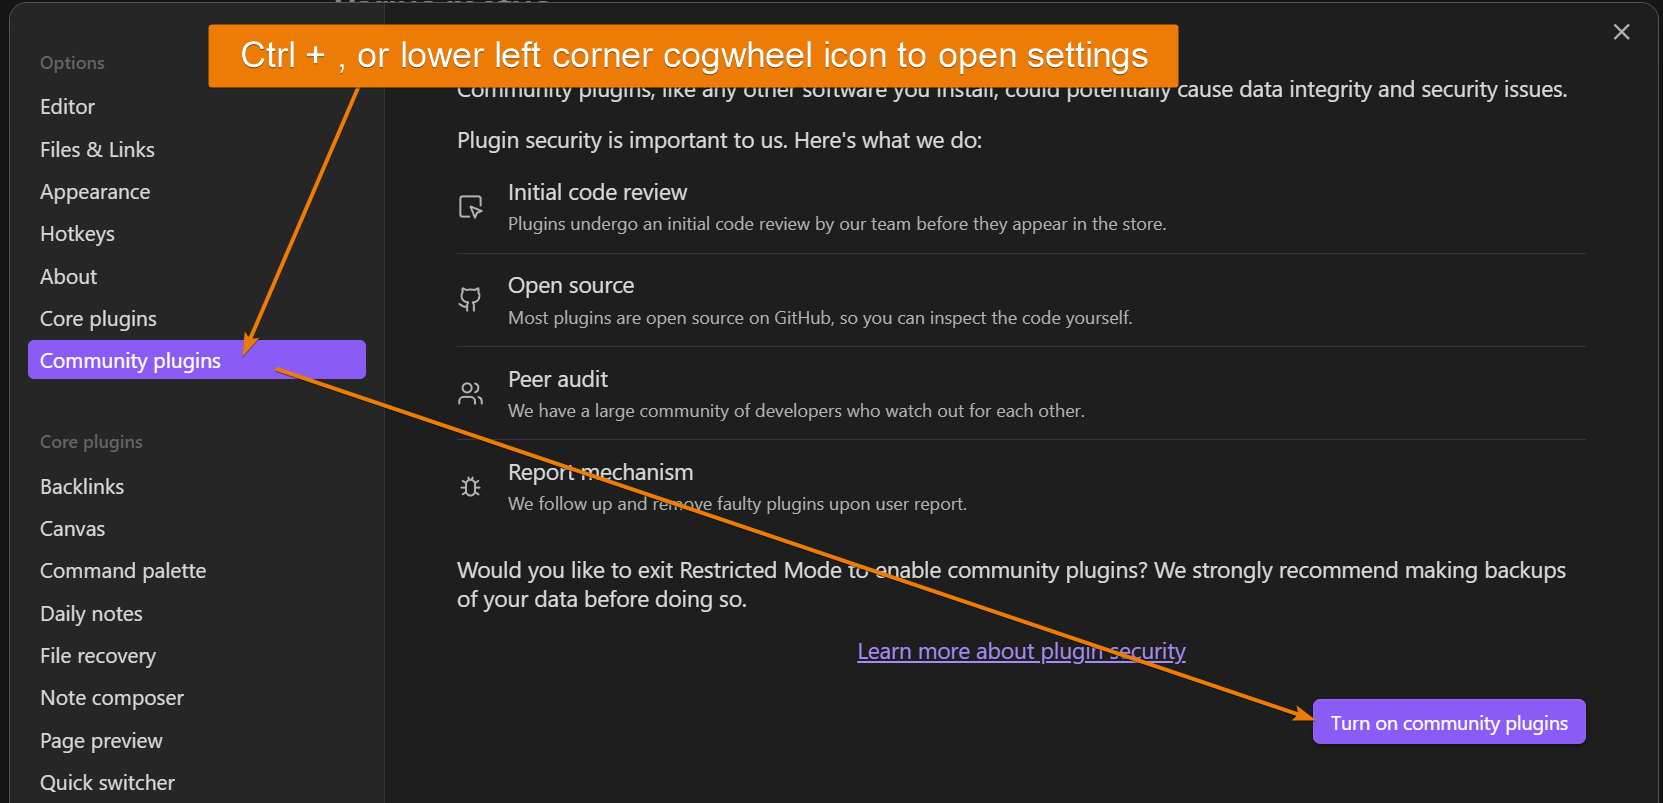
To simplify highlights, we can use the plugin highlightr. Go to Settings>Community plugins>Press Turn on community plugins if they are off. Next, click browse and search for "Highlightr". Click it and choose install. and Enable.
You can select the text you want to highlight, right click and choose "Highlight". A new menu will appear where you to choose one of multiple predefined colors.
Behind the scenes, Highlightr is creating a HTML tag with the CSS style tag with the correct color and background attributes. You can see this by putting your cursor in the highlighted text.
The settings for Highlightr can be found in Settings>Highlighter in the community plugin section.
You can find all Highlightr related commands by pressing CTRL+P and typing highlightr.
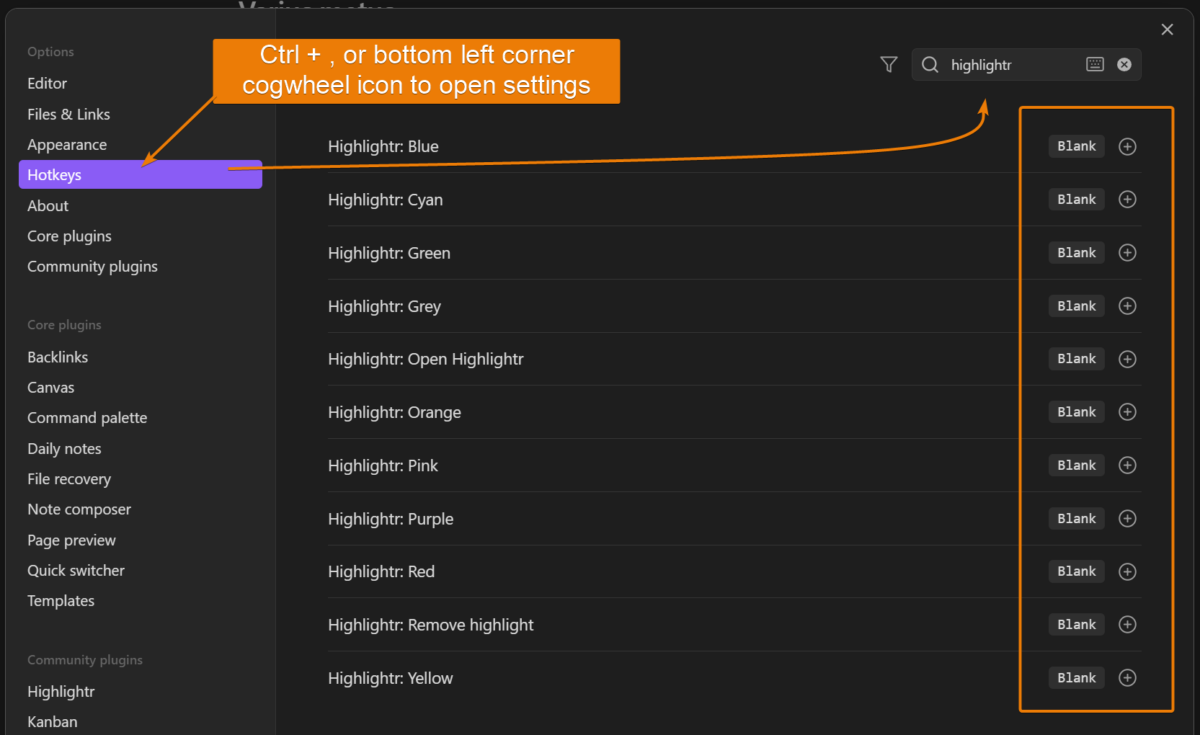
No hotkeys are set by default for highlightr, but you can configure all of them by going to Settings>Hotkeys and type "Highlightr" in the filter.

As we saw in the cheat sheet introduction double equal signs can be used to highlight text.
==This is some highlighted text.==
Obsidian is smart enough to understand that if you select some text and write double equal signs it will not replace the text, instead put the encapsulation around it. Like this.

When we have text that is maked with double equal signs it will be highlighted. Any symbols with the purpose of contributing to the style will then be hidden when the cursor is placed elsewhere on the screen.

But once we have the text cursor on a pice of text that has some modifier, like double equals for highlighting or CSS markdown, that code will again be visisble.
To see all markdown formating our text, you can press CTRL+A to select everything in your note. Or, select only the portion you want to view.
For basic highlighting in obsidian, apart from using the double equal signs, we can also use emphasis to make text stand out.
Emphasis are the bold and italics font variations. We can create bold text with either double star like this ** or double underline like this __

With just a single star * or a single _ underline surrounding the text, it will be italics instead and with three starts or underline both italics and bold will be active.
There is a setting in the editor section called "Auto pair markdown syntas" and similarly "Auto pair brackets". These settings can be a bit confusing and hard to find out what they actually do.

They make it so that if you make a star, or underline in the case of markdown syntas, it will pair it with another symbol on the other side of your text cursor. But they don't have any effect if you for example, highlight text and press Ctrl+I or CTRL+B to create bold or italics.
In these cases Obsidian will always create the symbols on both sides of the selected text.
Here we will go over highlightr in more detail, how to install, set it up and use it. In the next section we cover some additional settings and what they do.
Start by going to settings and community plugins. If you haven't installed any plugins before you will be presented with a warning that tells you that the plugins are written by third parties and could potentially pose a risk.
In my experience though, it is generally safe to use, at least the plugins that have a high use count. For the more niche plugins with fiew users, you might want to be a bit more careful depending on the scope and features of the plugin.
Press "Turn on communtiy plugins" to continue.
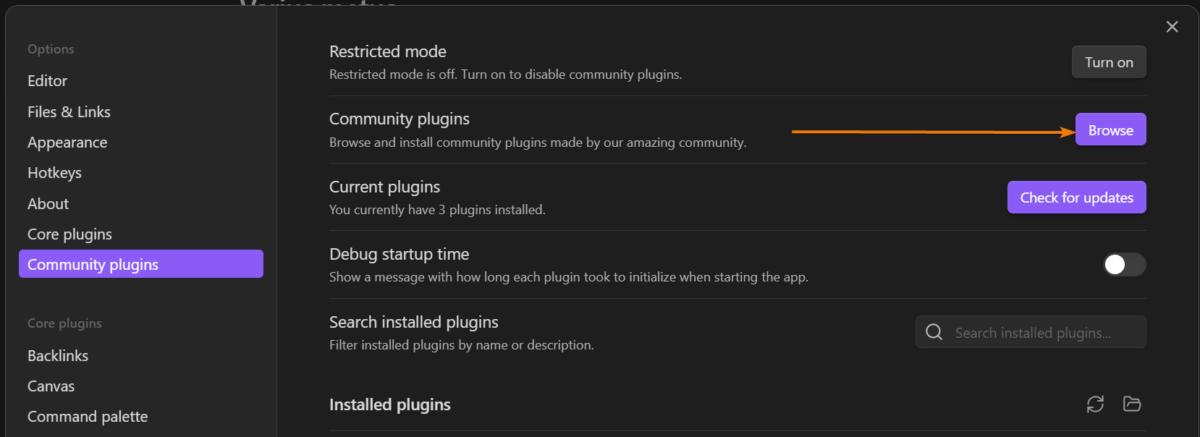
Next, press browse to open the community plugins library. Here we can go through the list of available plugins or search at the top of the interface.
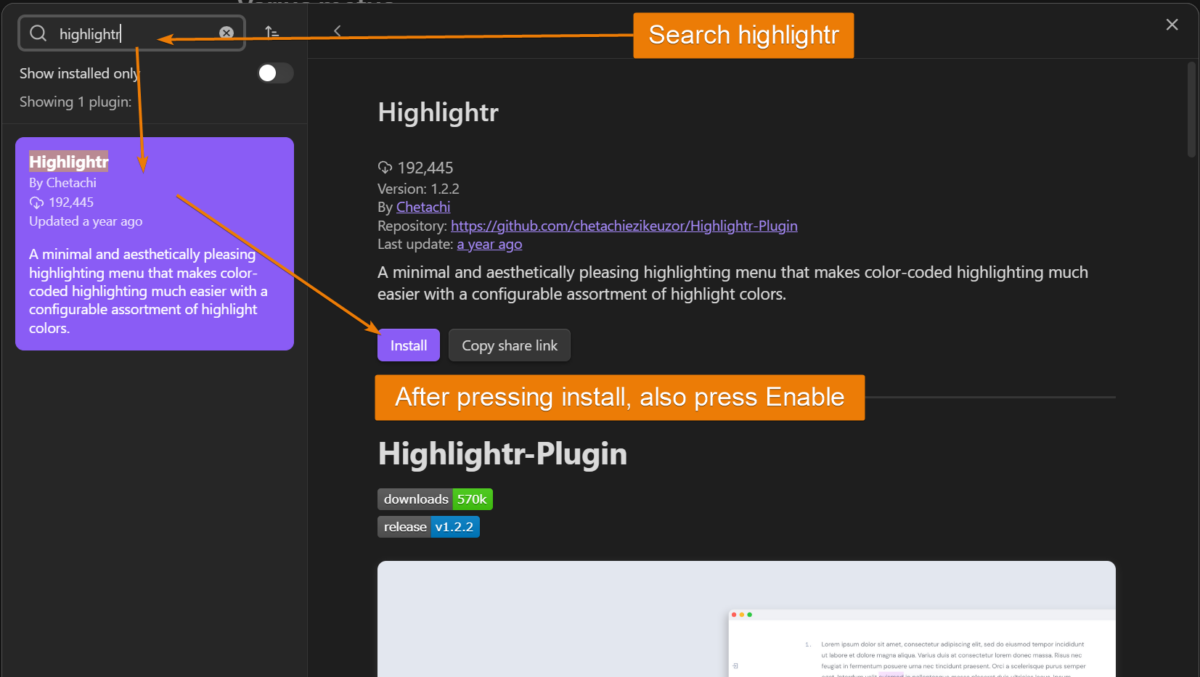
Search for "highlightr" without the quotation. You may see that the list filter as you type and there are a lot of plugins related to highlights, but Highlightr is a simple one that is also one of the most popular.
When you find highlightr, press it to open. Here you will find plenty of information about the plugin as well as the Install button just below the first set of information. Press install and then enable.
Next, exit the settings and press Ctrl+P to open the command prompt. Type "highlightr" to see all available commands.

If you have text selected, you can use any of the "Highlightr: color" commands to highlight with that color. You can also choose "Highlightr: open highlightr" to open the menu to pick color from.
You can also remove a highlight by using the "highlightr: remove highlight" commnad.
Most commonly though is probably to select text, right-click and choose "highlight" when you have text selected to highlight with the color you want.

Another tip, if you want to change the highlight color to any other color of a particular highlight is to click on the highlight so that the underlying CSS is showing, then double click the color code and set any other color code and the color will update.
To make highlightr easier to use, we can setup a hotkey for any of its commands, including bringing up the highlightr menu.
To change the hotkeys, got to Settings>Hotkeys and type "hihglightr" in the filter. Next, press the plus sign for any of the commands you want to hotkey and press the hotkey. For example, I setup the highlightr menu to open when I press Ctrl+Shift+H.
Additional settings can be changed if you go to settings>Highlightr. You find the settings for each plugin at the bottom of the settings menu under the headline "community plugins".
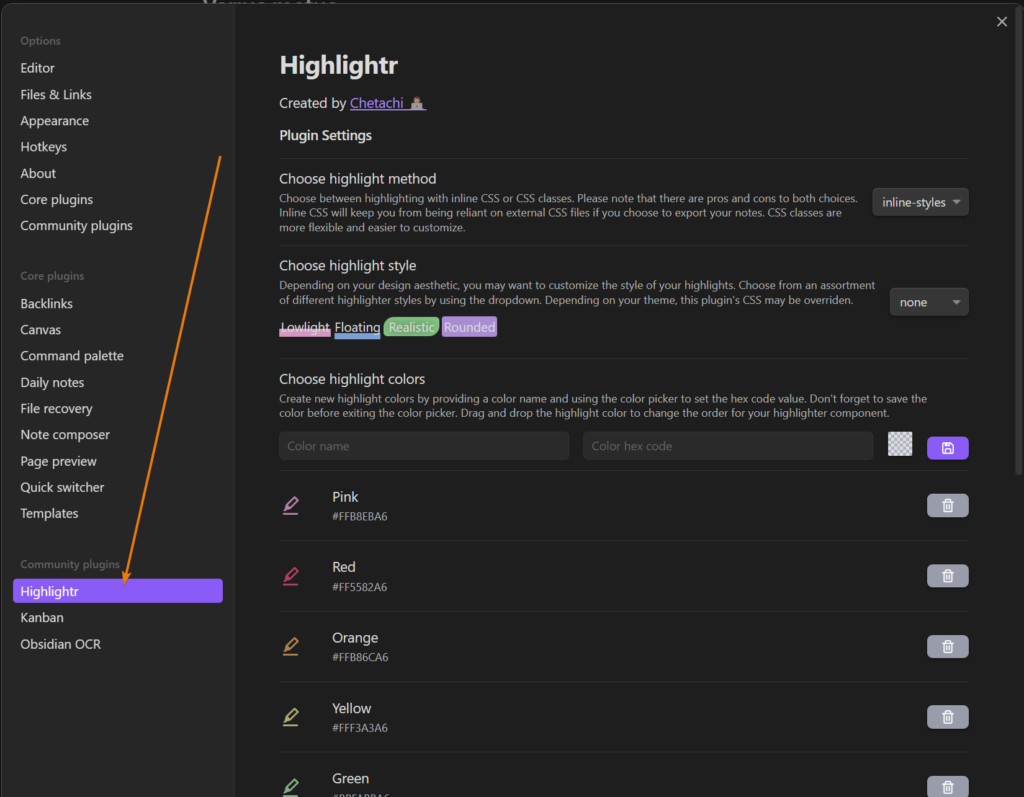
Here we can setup any highlight colors and names we want as well as change the style and CSS method.
The different styles can be viewed in the settings interface. The highlight method however is a bit more technical. It deals with if your CSS generated to produce the highlight should be inline, meaning that it is stored directly in your notes file or if it should rely on CSS classes.
Inline will follow your notes around while classes are stored in a separate file.
Highlighting in Obsidian range from easy to complex depening on your needs. For most people I would recommend to simply install highlightr, setup a hotkey for opening the highlightr menu and possibly to remove highlights easily, then just go with the default colors and settings.
Possibly also changing the style if that is something you want.
Other than that, once you installed it and used it a couple of times it is fairly straight forward.
Thanks for your time.