Viewing folder sizes directly in your file browser is very handy when you need to get an overview of how much data is stored where. This is how you do it in XYPlorer
To show the folder size in XYPlorer go to Tools->Customize List->Show folder sizes This will show the folder size of the currently selected folder in the status bar as well as for all folders in the list view in a separate column.
Let's see how else we can get clear on where our data is stored.

The traditional way of showing the size of a folder is available in XYPlorer as well. Simply right click a folder or file for that matter and go to properties. Once the properties window opens you will see two related values. One called size and one called size on disk.
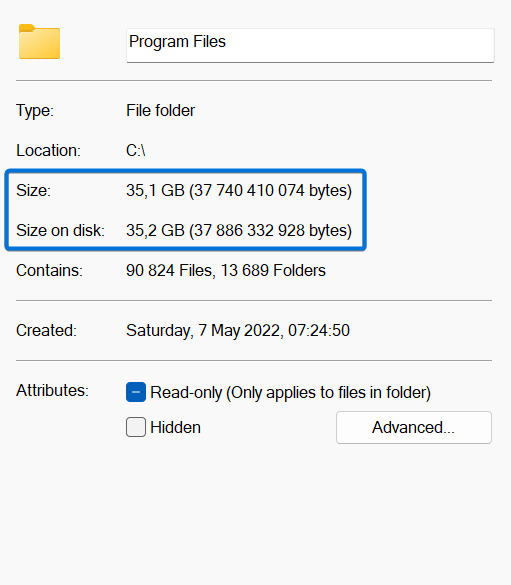
The difference between size and size on disk is that the size is the actual size of the file or folder. The size on disk on the other hand shows you how much size is taken up on disk by it. There is a difference because space is allocated in sectors for any given item, so this is the allocated space.
The size is displayed in bytes in parenthesis along with the shorthand in Kilobytes (KB), Megabytes (MB), Gigabytes (GB) and possibly Terabytes (TB). Beyond terabytes, there is unlikely on any personal computer or storage solution for homes or small business.
We can also create reports including the size of any files or folders. To do this we can press F12 or go to Windows->Info panel to open up the Info panel in XYPlorer.
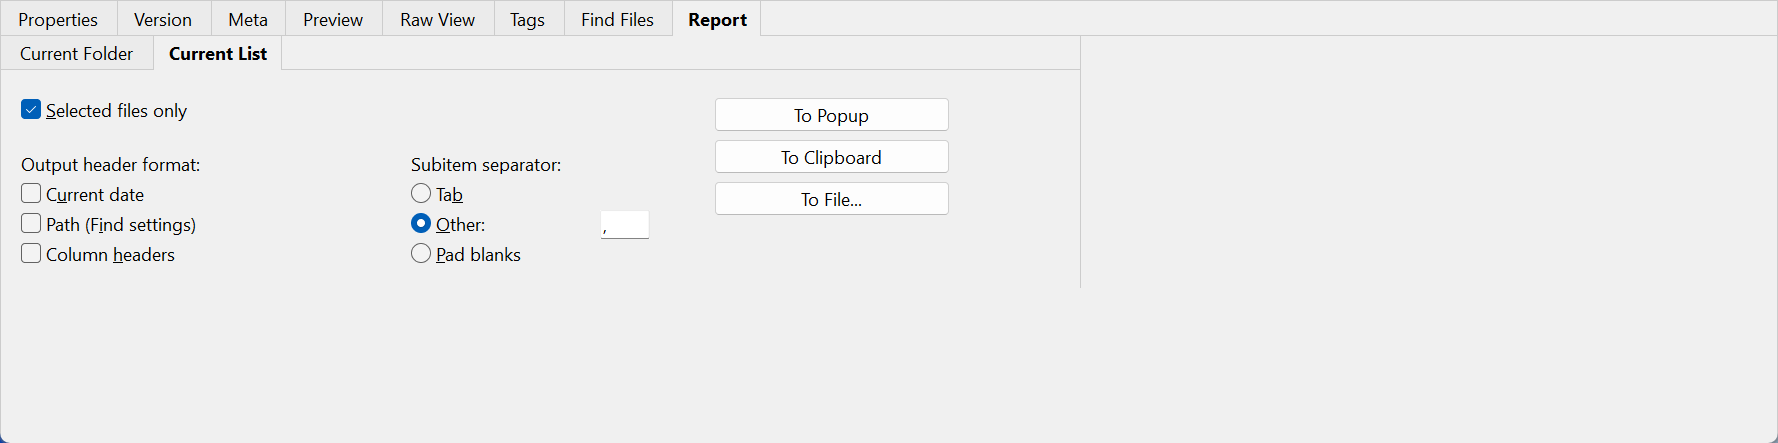
Next navigate to the reports tab, usually to the far right among the tabs in this panel. Before you start creating your folder size report though, make sure that you are showing folder sizes in the list since the data we export to the report is the data shown in this table.
So, to add it, once again, go to tools->customize list->Show folder sizes.
Next, we can start to craft our report. Navigate to the folder you want to create a report from. If you want a report of all folders contained in the folder you navigated to, uncheck the "selected files only" checkbox in the info panel report tab.
On the other hand, if you want just a subset of the folders, select the ones you want a report on.
Next choose your header types. Usually, you want this to be the column headers, so check that.
Next, we need to set a separator. To work with the data, we generally want a CSV format, or comma separated values. We could use any separator but for a comma, choose other in the subitem separator option and make sure that there is a single comma in the form field next to it.
Once done, press "To file" to export the report or "to clipboard" if you want to copy paste it somewhere else, like Excel for further processing.
We can also choose "To popup" to simply preview the export before we continue.
We covered several ways to view the folder size in XYPlorer. Including showing the folder size in the list view, the more traditional way of right clicking a folder and viewing the properties.
We also looked at how we can export the folder size along with some other data in order to create a report in an external application.
I hope it was helpful and thanks for your time.